Galaxy NexusにJelly beanを導入
![]()
Galaxy Nexusに、Android 4.1(Jelly bean)を導入した。
手順
「Google、GSM/HSPA+対応版Galaxy Nexus向けにAndroid 4.1(Jelly Bean)へのアップデートを配信開始 | juggly.cn」とのことで、待っていたけど、なかなかアップデートが来ない。
それもそのはずで、私のGalaxy Nexusは”yakjusz”で、”yakju”ではなかった。という事で、”yakju”のFactory Image(公式 4.0.4)を導入して、OTAアップデートで4.1に上げることにした。
簡単に書くと、以下の手順となる。
- OEM Unlock
- ClockworkMod Recovery導入
- Wipe
- Factory Image(“yakju”)導入
- システムアップデート
以下のサイトを先に読んでおくと良い。
- GALAXY Nexus (docomo SC-04D) oem unlock~clockworkMod recoveryによるバックアップ – Kazzzの日記
- Galaxy Nexus(SC-04D)にイギリス版ROM(ビルド番号ITL41F)を手動アップデートする方法。 – Android(アンドロイド)おすすめアプリ・カスタム情報|AndroidLover.Net
(注意)私のGalaxy NexusはDocomo版ではない。Docomo版ではradio.imgを書き戻す必要があるだろう(参考)。
OEM Unlock
音量の上ボタンと下ボタンを同時に押しながら、電源ボタンを押すと、ブートローダーが起動してくる。ここでfastbootコマンドを打つ。
[bash]
katou-no-MacBook-Air:~ ei$ fastboot devices
014696C30501A01C fastboot
katou-no-MacBook-Air:~ ei$ fastboot oem unlock
…
OKAY [ 81.113s]
finished. total time: 81.113s
[/bash]
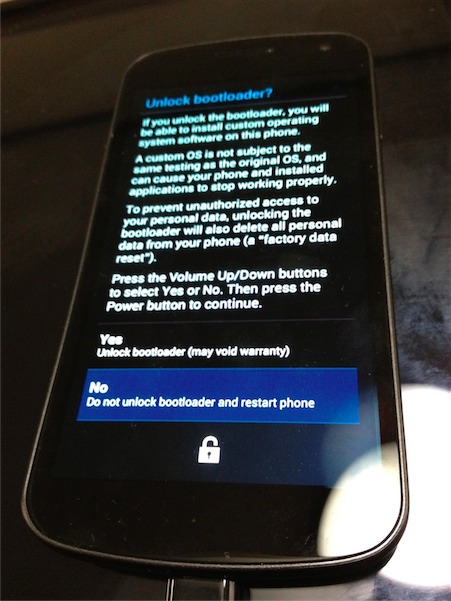
ロック解除画面が立ち上がってくるので、音量の上ボタンを押してYESを選択して、電源ボタンで実行する。OEM Unlock完了。
ClockworkMod Recovery導入
まずは、「[RECOVERY] ClockworkMod Recovery *GSM Edition* – xda-developers」をダウンロード。
音量の上ボタン+下ボタン+電源ボタンで、ブートローダーを起動する。fastbootコマンドで、ClockworkMod Recoveryでブートするようにする。
[bash]
katou-no-MacBook-Air:galaxynexus ei$ fastboot boot recovery-clockwork-5.5.0.2-maguro.img
downloading ‘boot.img’…
OKAY [ 0.835s]
booting…
OKAY [ 0.329s]
finished. total time: 1.164s
[/bash]
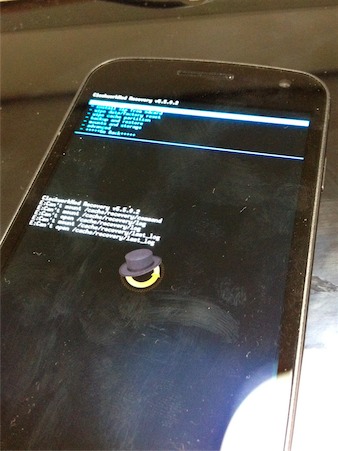
起動すると、青い文字の画面となる。
下にエラーが出ているが、これはOEM Unlock後にAndroidを起動すると表示されなくなる(? 記憶が曖昧。Wipeだったかも)。ここでは何もせず、Androidを起動して、再度ClockworkMod Recoveryを起動してから、先に進むと良い。
もちろん、ここでNANDバックアップも取得しておく。
Wipe
順にwipeしていく。
- 「wipe data/factory reset」
- 「wipe cache partition」
- 「advanced」から「wipe Dalvik Cache」
- 「advanced」から「wipe Battery Stats」
Factory Image導入
公式のAndroidのROMは、「Factory Images for Nexus Devices – Android — Google Developers」から入手可能。ここから、”yakju”をダウンロード。解凍すると、インストールのシェルなどがあるはずだ。
ブートローダー画面にして、インストールのシェルを流す。
[bash]
katou-no-MacBook-Air:yakju-imm76i ei$ ./flash-all.sh
sending ‘bootloader’ (2308 KB)…
OKAY [ 0.367s]
writing ‘bootloader’…
OKAY [ 0.301s]
finished. total time: 0.668s
rebooting into bootloader…
OKAY [ 0.006s]
finished. total time: 0.006s
sending ‘radio’ (12288 KB)…
OKAY [ 1.825s]
writing ‘radio’…
OKAY [ 1.364s]
finished. total time: 3.189s
rebooting into bootloader…
OKAY [ 0.007s]
finished. total time: 0.007s
archive does not contain ‘boot.sig’
archive does not contain ‘recovery.sig’
archive does not contain ‘system.sig’
——————————————–
Bootloader Version…: PRIMELA03
Baseband Version…..: I9250XXLA2
Serial Number……..: 014696C30501A01C
——————————————–
checking product…
OKAY [ 0.007s]
checking version-bootloader…
OKAY [ 0.008s]
checking version-baseband…
OKAY [ 0.008s]
sending ‘boot’ (4148 KB)…
OKAY [ 0.655s]
writing ‘boot’…
OKAY [ 0.254s]
sending ‘recovery’ (4478 KB)…
OKAY [ 0.671s]
writing ‘recovery’…
OKAY [ 0.520s]
sending ‘system’ (316111 KB)…
OKAY [ 35.767s]
writing ‘system’…
OKAY [ 34.853s]
erasing ‘userdata’…
OKAY [ 0.611s]
erasing ‘cache’…
OKAY [ 0.013s]
rebooting…
finished. total time: 73.403s
[/bash]
これで導入完了。あとは再起動するだけだ。
システムアップデート
Android 4.0.4で起動するので、システムアップデートを行う。これで、Android 4.1に更新される。

